Hello again! Today in Southern Ontario we are digging out from a snowstorm that brought us enough snow that yesterday was a SNOW DAY!!! We ended up with a good amount of snow – probably close to the 30cm they were calling for, with lots of blowing snow drifts that piled up to a lot higher. Since we had a snow day yesterday, I spent lots of time in the morning cuddling, following, and playing with my little man. However, during his nap time mama got to get a little crafty! I managed to make a card for days 6, 7, and 8 of
Clean and Simple 2. Here they are:
Oh, but before I go any further, I have no affiliation with Paper Smooches stamps! I began to notice as I was creating all of the cards for CAS2, that I kept reaching for the PS stamp sets. Not sure why, but I just love them! Now, carry on…
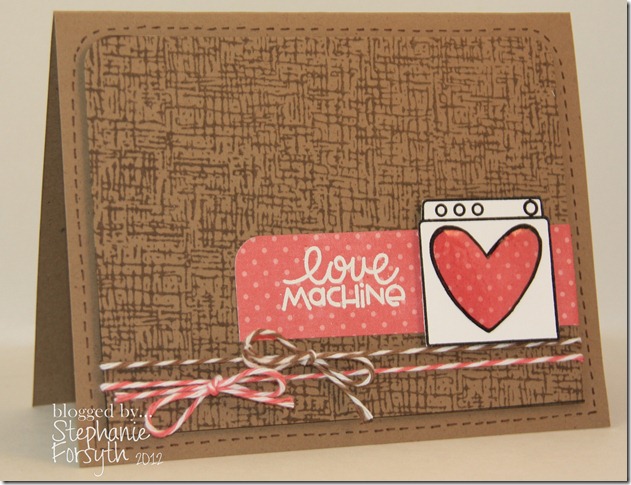
Day 6: More Sketches

For this card, I used the same sketch Kristina Werner used in her example. I incorporated an image and sentiment from Paper Smooches “Squeaky Clean” stamp set. The background was stamped with the Hero Arts envelope liner stamp in Hero Arts “Cup-o-Joe” ink. I also tied on some Twinery twine in Strawberry and Cappuccino.
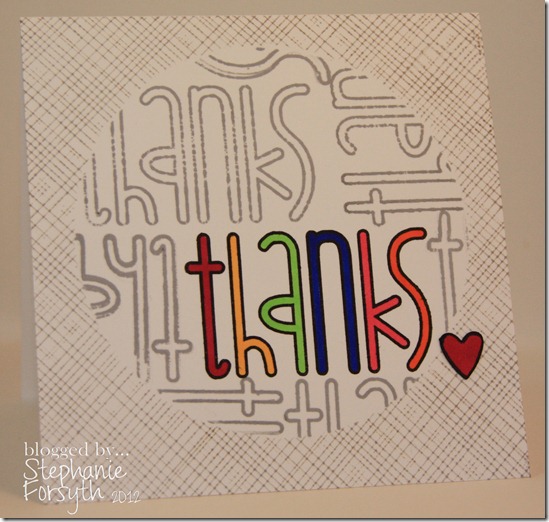
Day 7: More One Layer Cards

This card’s dimensions are 4 1/4X 4 1/4. First I created a mask using a large post-it note and a circle die. Then I used the negative space as a mask for the sentiment. I stamped the “thanks” in Versafine onyx first, then several more times using Hero Arts “Soft Granite” shadow ink before going back and colouring the original one with copic markers. When I removed the mask, I liked it, but it wasn’t quite complete. So I put the positive piece down and stamped the Hero Arts “Envelope Pattern” stamp in the Soft Granite ink. Yet.. it still needed a little something. Finally, I punched out a heart, coloured it with a copic, outlined it, and glued it on. I really do like the final product and using a technique that I hadn’t used before.
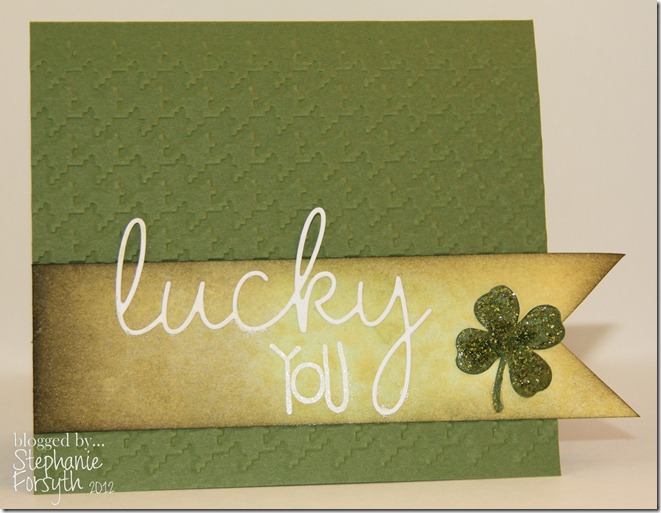
Day 8: More Inking and Stamping Techniques

I am always perusing Pinterest for cool ideas for my classroom and lately I’ve been noticing a lot of people posting “salted watercolour” pictures. I love the sounds of it, but never really thought of applying it to card making until I saw Kristina Werner using it. I decided to try it out myself, using a variety of green distress inks. I’m not sure if it’s just because of the colours I chose, but it wasn’t that effective (you can see it more in real life). I will definitely try it again with more colours to see if the salt has a greater effect. The “lucky” is die cut from a Papertrey Ink die, and the “you” is a Paper Smooches stamp, stamped in Versamark, and white embossed. I used a Martha Stewart punch for the clover, coloured it with a Distress Marker and covered it with the same colour of Distress Stickles (I believe it’s Peeled Paint"). The embossing folder I used is from Cuttlebug.
Thank you so much for stopping by! I’m hoping I can get in a few minutes of crafty time this afternoon to make cards for Days 9 and 10.
See you soon,
Steph


